Archive for the ‘Design Related’ Category
How to get Banners, Headers and Video Designed Professionally
I get a lot of requests from customers asking us to make them a banner, video or even creating a very sophisticated header with moving images. One thing that we don’t do is to claim that we are good at something we are not. Our company is not a professional design company, we are a professional marketing and software company specializing in sports handicapping and online gaming. We do designs for our clients when they setup new website. Typically the designs that we do are basic and functional (always static) but they incorporate no moving elements (animated elements) using technologies such as Flash. The reason? We simply are not the best choice.
Our responsibility is to provide our customers with the best advice. The best advice we can give them when getting a design made is to outsource it to a professional. Here are a two places where you can get designs done:
1. Fiverr – This is a the low-end and the quality can vary but for $5 it’s worth a try. Don’t expect great work but you may get lucky.
2. 99Designs – Wildly popular service that matches you up with professional designers and puts your project in front of them in a contest-style environment where you get to choose the best design. Most designers on here are experienced professionals.
Although we can do designs for clients, it will cost far more since it takes us far longer to do the same thing as the professional designers on these sites.
Banner Specifications
When you get a design made you’ll need to provide to them the size specifications. Here they are.
Banners Images:
- The horizontal banners on all of our sites are 728×90 pixels
- The vertical banners on our site are either 120×240 (eg. Register Page) and 120×600 pixels (other pages)
Inserting the banners require you to host the banners yourself similar to hosting images. See https://blog.ezcapper.com/2010/07/hosting-your-own-images-and-using-the-html-editor/
Inserting the banners require you to host the banners similar to hosting images. See https://blog.ezcapper.com/2010/07/hosting-your-own-images-and-using-the-html-editor/
If you want us to set this up for you it will cost $25.
If you want to make a banner ad for advertising on another network find out what sizes they take. The standard ad sizes can be found here.
Website Images
See this post if you want to change your header or any part of your site:
https://blog.ezcapper.com/2010/06/how-to-create-your-own-website-design/
This will tell you the size of each required image.
We charge only $25 for incorporating the finished designs into the code for the website.
Source Image
If the designer requires the original fonts or the original source files of your logo we can provide that to them. Most designers will likely redo this from scratch however.
Hosting your own Images and using the HTML Editor
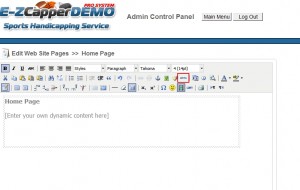
 I get a lot of questions asking how to add an image to the body content. The first thing you must know is that to do this you must access the html editor. You access it by clicking on the HTML button (click on the image below). In the html code you must link the image you want to where you are hosting it. There are plenty of places which do free image hosting. A quick search on Google shows the following services that host images for free:
- http://imageshack.us/
- http://tinypic.com/
Step 1. Once you upload your image to these services you will obtain a URL where you will use in your HTML code. Once you reference this image in the html code via your html editor, your body text will show the image.
There are two options to get this image into your page:
Basic Users: Use the Image Editor
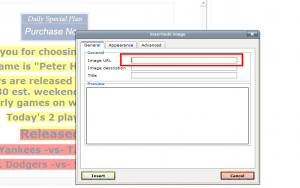
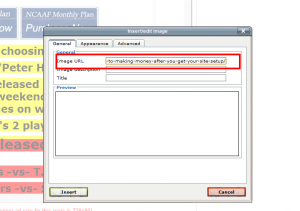
- Step 2 – Select the Insert Image button and paste the url from Step 1 into the Image URL box. The other two boxes are optional. After inserting it, save the page and the image should show.
Adding a link
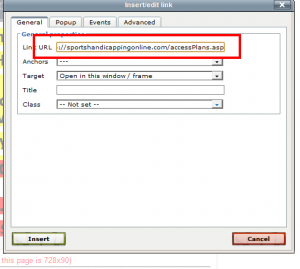
- If you want to add a hyperlink to the image simply select the image link button and it copy and paste the URL (e.g. http://www.google.com) to the page you want to link to.
Advanced users: Use the HTML Editor
- Step 2. Take the url of the image and insert it into the HTML Code. If you don’t know HTML you can browse the net for more details. It’s very easy to use and many programs like Microsoft Word will automatically convert it for you. For a very basic primer refer to: http://www.w3.org/MarkUp/Guide/
Creating a paypal button to accept money
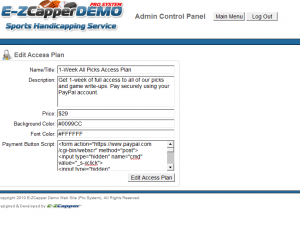 A lot of questions from Paypal novices on this topic.
- Watch this video http://www.youtube.com/watch?v=u-xHhgMncxk and make your Paypal buttons according to your desired access plan. Copy and save the “code” for the buttons.
- Login to your control panel and find the “Manage Access Plans” section. Click “Add New Access Plan” and specify the information for your access plan including Name, Price, Colors etc. Copy and paste the code you obtained in step 1, into the box “Payment Button Script”. (See image on this post)
- Click the “Edit Access Plan” button to save.
- Your button should show on your Access Plans page.
For sample references of how our other clients setup their access plans visit our client page here and click on Access Plans to see how they have set it up.
How to create your own website design
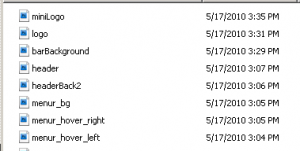
We have clients that wish to setup their own website. In order to this you need to change a set of 8 files. For the purposes of this example, I will reference the demo site system that can be found here http://demo.ezcapper.com/
The header.jpg file is 900×165 pixels and this is the main banner on the home page.
The header consists of two files wit the second file being headerBack2.jpg (900×46 pixels). This file is a tricky file as it connects the header to the menu system. More….
The second set of files comes as (notice they are all .gif files)
menu_hover_right.gif (250×46)
menu_hover_left.gif (19×46)
menu_bg.gif (2×46)
These files make up the hover menus when you put your mouse over the main menu ( “Home”, “Register”, “Access Plans”, etc. ).
The next set of files:
logo.jpg (330×95)
miniLogo.jpg (140×80)
are referenced at the following pages:
- header image of http://demo.ezcapper.com/admincontrolpanel
- right column image at http://demo.ezcapper.com/
The last image barBackground.jpg (5×22) is the color bar reference used in the “Member Login” background.
Please note the following:
- The 3 files in the hover menu set can be designed as a solid color or a semi-transparent image by making some adjustments.
- The images must be in EXACTLY the same pixel size and format (jpg or gif) in order for us to bring it to the system.
- The header set of 2 files must align exactly particularly when using an image.
- Access your admin settings and adjust the other colors in the “Edit Website Info / Settings” button.
Below I’ve attached the list of files for reference for the demo site. Click on the files twice to download.
Welcome to our New Blog
This blog is to keep our customers apprised on all our developments. As a full-service company we provide complete solutions to help our customers earn more money. Subscribe to our RSS Feed by adding us to Google Reader or other RSS reading tool.
Contact us if you have any questions on any of our services. We can be reached at your convenience.
