How to create your own website design
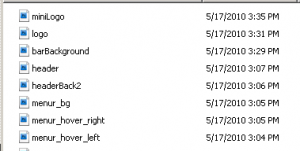
We have clients that wish to setup their own website. In order to this you need to change a set of 8 files. For the purposes of this example, I will reference the demo site system that can be found here http://demo.ezcapper.com/
The header.jpg file is 900×165 pixels and this is the main banner on the home page.
The header consists of two files wit the second file being headerBack2.jpg (900×46 pixels). This file is a tricky file as it connects the header to the menu system. More….
The second set of files comes as (notice they are all .gif files)
menu_hover_right.gif (250×46)
menu_hover_left.gif (19×46)
menu_bg.gif (2×46)
These files make up the hover menus when you put your mouse over the main menu ( “Home”, “Register”, “Access Plans”, etc. ).
The next set of files:
logo.jpg (330×95)
miniLogo.jpg (140×80)
are referenced at the following pages:
- header image of http://demo.ezcapper.com/admincontrolpanel
- right column image at http://demo.ezcapper.com/
The last image barBackground.jpg (5×22) is the color bar reference used in the “Member Login” background.
Please note the following:
- The 3 files in the hover menu set can be designed as a solid color or a semi-transparent image by making some adjustments.
- The images must be in EXACTLY the same pixel size and format (jpg or gif) in order for us to bring it to the system.
- The header set of 2 files must align exactly particularly when using an image.
- Access your admin settings and adjust the other colors in the “Edit Website Info / Settings” button.
Below I’ve attached the list of files for reference for the demo site. Click on the files twice to download.


